


Choosing to learn to play the guitar is one of the best decisions you’ll ever make. Mastering your new six-string friend will teach you dedication, patience, and perseverance, as well as stimulate your brain and reduce stress. Join a group or perform regularly, and your social life will get a boost, too. More than anything, playing the guitar is an incredibly joyful experience that brings reward after reward. It’s downright good fun!
Of course, learning isn’t always plain sailing, so to launch your playing career with the best possible start, we’ve put together a list of 13 things every beginner should know – covering techniques, tone tips, gear choice, and more. Start well, end well!
1. Buy the right guitar
You can learn to play on any guitar. After all, many of the guitar gods of the ’60s and ’70s learned to play on atrocious instruments simply because that’s all that was available to them. However, if you’ve got the budget, buying a guitar that suits your needs best is going to smooth your learning path immensely.
Traditionally, novices would be palmed off with a god-awful cheap, nylon-stringed acoustic with an action a mile high and a neck as broad as the Mississippi. Fortunately, times have changed. The first thing to consider is the genre of music that got you excited about playing the guitar in the first place.
If it’s predominantly acoustic – folk, fingerstyle, Latin jazz, and so on – then an acoustic guitar is probably the way forward. If you have more of a taste for blues, rock, or metal, then an electric guitar will almost certainly be more your thing. Trying to play an acoustic genre with an electric guitar and vice versa is feasible, but it can suck much of the fun away.
Bear in mind that, due to their lower action and lighter strings, electric guitars can be easier to learn than acoustics. They also tend to be more stable and less resistant to temperature change, so they stay in tune longer. Additionally, building a good electric guitar is far less expensive than building a good acoustic guitar because it doesn’t require the same level of skill or investment in materials.
So, if you’re on a budget, then an electric guitar package, complete with a small practice amp, makes enormous sense. We cover the acoustic vs electric guitar for beginners debate in more detail here.
Father shows his baby how to play guitar (Credits: Getty Images)Always buy the best guitar you can afford because it will invariably sound better and be easier to play. Cheap acoustics are notoriously hard to tune and unpleasantly difficult – read painful – to play.
For the best buying advice, check out our buyer’s guides covering the best acoustic guitars for beginners and the best electric guitars for beginners available today.
2. Going acoustic? Buy the right size
Acoustic guitars come in a variety of shapes and sizes, labeled with a bewildering number of names. In the classical guitar world, nylon-strung guitars made for children and smaller-framed adults look and play just like scaled-down versions of full-size guitars.
These may be 1/2 size (Requinto), 3/4 size (Cadet), 7/8 size (Senorita), and 4/4 (Full size). If you are a budding classical player blessed with a smaller build, then an appropriately sized classical guitar will be easier to play and will help you avoid the back and shoulder pain that a model that’s too big will almost certainly introduce.
Steel-strung guitars are also available in a range of sizes, so you’ll see labels such as OO, OM, Grand Pacific, and Dreadnought. Unfortunately, few of these names are standardized, which means that although two brands may make a GC or Grand Concert guitar, they’ll measure up significantly differently.
Many novices are wrongly drawn to dreadnoughts – a name penned by guitar manufacturer Martin and one of the few that is now fairly standardized across many brands – solely because they’ve seen these big guitars in the hands of their favorite artists. Bigger is better, right?
The fact is, steel-strung guitars vary in size mostly for tonal reasons rather than fit, and the bigger the guitar, the more volume and bass response it will have. Buying a mid-sized guitar, like a Martin OM or a Taylor Grand Auditorium, will not only fit most players better than a dreadnought, but it will also sound sweeter and more balanced. So, don’t be afraid to go for a smaller guitar – the tone will probably be better.
Size is not such an issue for electric guitar players. That said, tall, broad guitarists may find they dwarf a Gibson Les Paul or a Fender Telecaster, so they are better off with a larger guitar such as a Gibson ES-335.
3. Learn to keep it in tune
Yep, it was in tune when you bought it, but now listen to it. Sadly, even the best guitars don’t stay in tune very long because the vast majority are made of wood, which is very susceptible to changes in temperature and humidity.
Letting your guitar drift out of tune isn’t going to damage it, but it will hurt your ability to learn. This is because it’s vital to gain the skill that will let you match pitch to a position on the fretboard or distinguish the interval between two or more notes. At best, practicing with an out-of-tune guitar makes this process painfully slow, at worst, impossible.
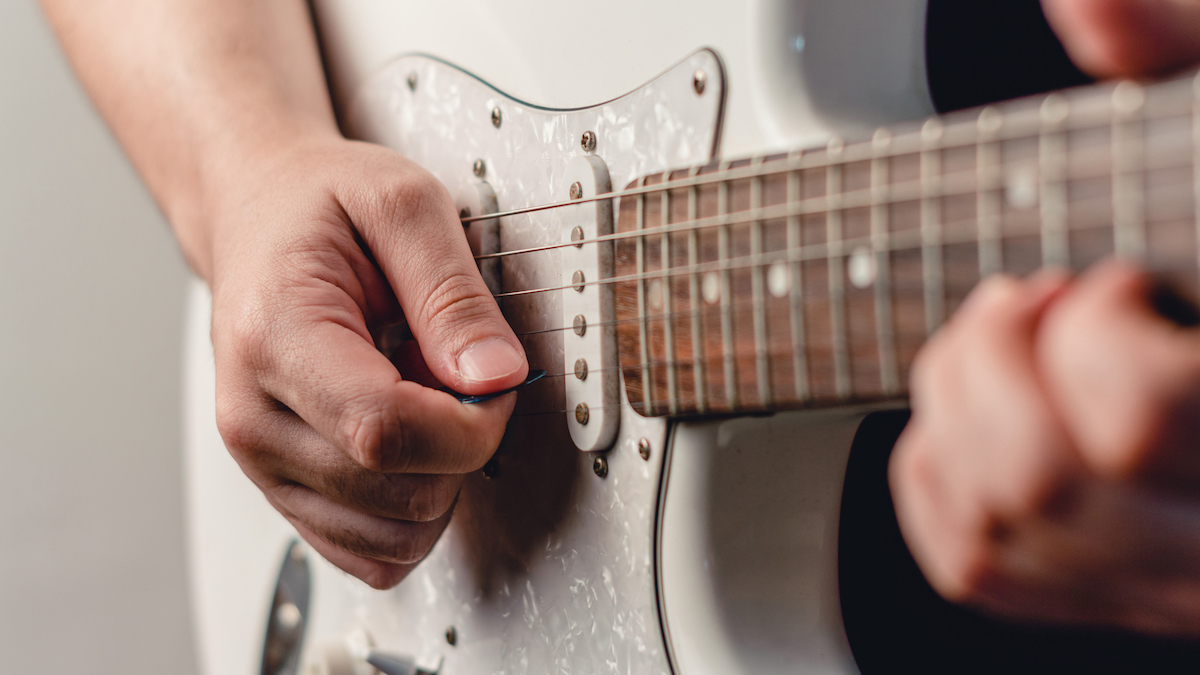
Close-up of picking hand on a guitar (Credits: Getty Images)
Tuning is a bit of a chore, but guitar tuners are ubiquitous and cheap. In fact, many tuning apps are free. Beginners should probably stick to standard tuning at first, in which the strings are tuned low to high (thick to thin) E A D G B E, but in time, don’t be afraid to experiment with alternate tunings such as Drop D and Open C.
4. Learn the right way to pick
If you’ve never used a guitar pick, aka plectrum, before, then you’re probably wondering how best to hold it. Grip your pick firmly, but not too tightly, between the finger and thumb of your picking hand, which will be the right hand for many of us. Don’t bend your wrist awkwardly. Your thumb and arm should be pretty much in a straight line.
Initially, start picking the lower (thickest) open E string in a downward motion – a downstroke – before moving one by one onto the rest of the strings. Try to make the strings ring out clearly with a full sound. Then, practice picking the high (thinnest) open E string in an upward motion – an upstroke – before moving back through the rest of the strings.
As you pick a string, the movement should come from your wrist rather than your arm or your shoulder. Try to limit your range of motion when picking so that the pick never moves too far away from the strings. Otherwise, it may take you too much time to pick the next note. Some guitarists favor slanting the tip of the pick downwards slightly, too, so that the pick glides over the strings more easily.
5. Work out the best way to fret
Fretting can be tricky to learn, but get it right, and your tone will improve immeasurably. Frets are the metal strips – fret wire – that line up all along the fretboard, and they are numbered consecutively from the first fret, which is the one closest to the headstock.
Don’t confuse the nut with frets. The nut sits adjacent to the headstock, has slots in it to support the strings, and is usually made of bone or some kind of composite (although brass nuts are a thing too). Fretting can be tricky to learn, but get it right, and your tone will improve immeasurably.
To play the first fret, place the tip of your finger on any string directly behind the fret wire and press down firmly. Pick the string with your other hand, and you should hear a clear sound ringing out with a decent amount of sustain.
By pressing your fingertip behind the fret, you’ll be bringing the string in direct contact with it, limiting the length over which it can vibrate, thereby increasing its pitch. Press directly on the fret wire, and you’ll end up with a muffled sound. If you press too far behind the fret wire, the string will probably buzz when being picked.
A common mistake that beginners and even some intermediate players make is to press too hard, which can quickly result in hand strain and sore fingertips. Practice applying just the right amount of pressure. Too little, and the note will be indistinct and suffer buzz. Too much, and your fingers will hurt. You need just enough pressure to coax a really nice, clean sound from your guitar.
6. Are you sitting comfortably?
There are numerous ways to sit with a guitar. Classical guitarists tend to sit with their knees apart and, if right-handed, with the guitar resting predominantly on the left leg. A few of the rest of us adopt this rather formal position, too, or opt for a more relaxed hold by resting the instrument on the right leg. Some players are comfortable crossing their legs, and others swap between many positions, seemingly on a whim.

Man playing guitar sitting down (Credits: Getty Images)
Unless you are a classical player, there’s no right or wrong here. Just try your best not to hunch over the guitar, instead keeping a straight back and a straight but relaxed neck. Also, make a real effort to keep the guitar parallel to your body. You won’t be able to see the fretboard, which takes some getting used to, but you’ll be less likely to hunch over your guitar, and memorizing the fretboard becomes much easier.
7. Take a stand
At some point, you’re going to want to perform your guitar skills in front of a live audience, which may necessitate playing your guitar standing up. Whether you choose to play your guitar high up on your chest like Tom Morello or slung mean and low like Johnny Ramone is entirely up to you but work hard at keeping your posture intact.
For most guitarists, aligning the center of the body of the guitar with the hips appears to be the optimal position. This puts the instrument roughly in the same place as it is when you are playing seated, giving both arms plenty of freedom and enabling the fretting wrist to operate through a good range of movement.
8. Master strap skills
It’s just a strap, right? How hard can it be?
Well, you’re going to need a good guitar strap if you plan on playing much standing up. We recommend choosing a wide, soft strap because it will spread the weight of your guitar, which can be significant, across your shoulder. Many acoustic guitars don’t have an endpin at the neck, so pick a strap with a strap tie or ties. This can be fixed to the neck with a simple knot.
Most of us practice sitting down, so, as mentioned in tip 6, it makes sense that our guitar adopts a similar position when we play standing up to perform.
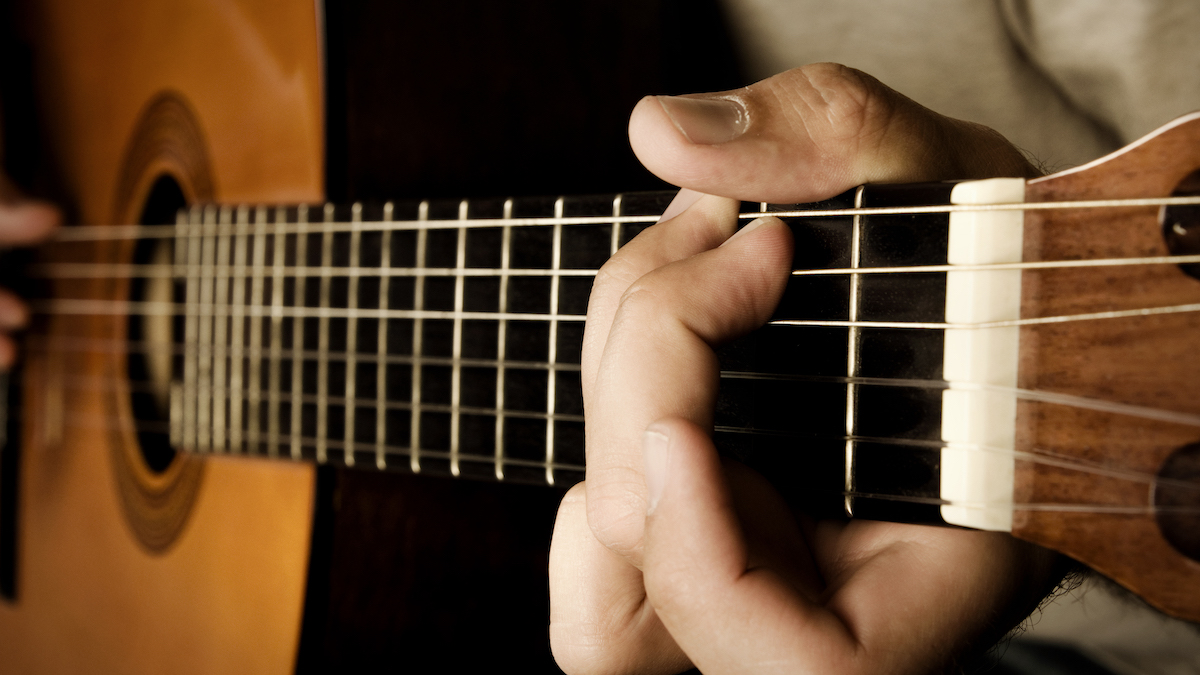
Close-up of hand playing a g chord on acoustic guitar (Credits: Getty Images)
First, make sure your strap is fastened to the end pins on your guitar. Strap locks – small horseshoe-shaped pieces of metal or composite material secured to your strap ends and that clip securely onto your guitar’s end pins – is a worthwhile upgrade if you rock a lively stage presence. Sit down with your guitar and adjust the strap length to take up any slack. The strap shouldn’t be tight, but the guitar should be well-supported. Stand up, and you should find the guitar remains in roughly the same position in relation to your body.
Most guitarists don’t use a strap when seated, but some find it a real help in keeping their guitars securely in place. Using a strap can be especially useful for keeping in check guitars that are poorly balanced or are coated in a slippery, high gloss finish.
9. Learn some cowboy chords
Guitars may take a lifetime to master, but you can be knocking out some of your favorite songs in no time once you’ve learned a few basic open chords.
This handful of open chords, often nicknamed ‘cowboy chords’, are really all you need to make a start. Each chord is named after its root note, which is usually the lowest note in the chord. Major chords are derived from a major scale and tend to sound happy and upbeat. Minor chords are derived from the minor scale, making them sound more solemn and mysterious.
- A Major
- A Minor
- E Major
- E Minor
- D Major
- D Minor
- C Major
- G Major
These chords are called open chords because they include open strings, which is why you’ll also find them played at the top of the neck. Once you’re comfortable playing this selection, add further nuance and character to your repertoire with extended chords, such as 7ths and 9ths. Then, experiment with barre chords, which are moveable chord shapes that can be played up and down the fretboard.
10. Schedule your practice
Sadly, many people give up playing the guitar after just a few months. Often, this is because they become disillusioned by a lack of progress, which is commonly due to lack of practice. Signing up for one-to-one lessons, or online guitar lessons, can really help here because both the teacher and app will set you goals that give you that extra push to practice consistently with intent. Many people give up playing the guitar after just a few months. This is commonly due to a lack of practice
If these options are beyond your budget, then at the very least, put time aside to practice. Try to schedule at least five sessions a week lasting a minimum of 15 minutes each, preferably longer.
Otherwise, if you don’t prioritize your practice, other stuff in your life – work, kids, pets, TV, gaming – will squeeze your guitar playing until it feels impossibly hard to make any progress at all.
Learning to reach a good level is relatively easy, provided you practice.
11. Train your ears
This is a skill that most of us lack, simply because when you first start, it seems almost impossible. Ear training enables the brain to make a connection between the fretboard and the notes we hear. In other words, with practice, you should be able to replicate a solo played by your favorite guitarist just by listening to it. More usefully, you’ll be able to play the melodies and riffs you hear in your head, a vital skill for anyone who wants to be able to improvise creatively. Who doesn’t?
Ear training is a huge subject that’s equally important for beginners as it is for advanced players. Make a start by carefully listening to a piece of music you know well – nothing too complicated – and then try to reproduce it on your guitar. Perhaps start with a simple solo.
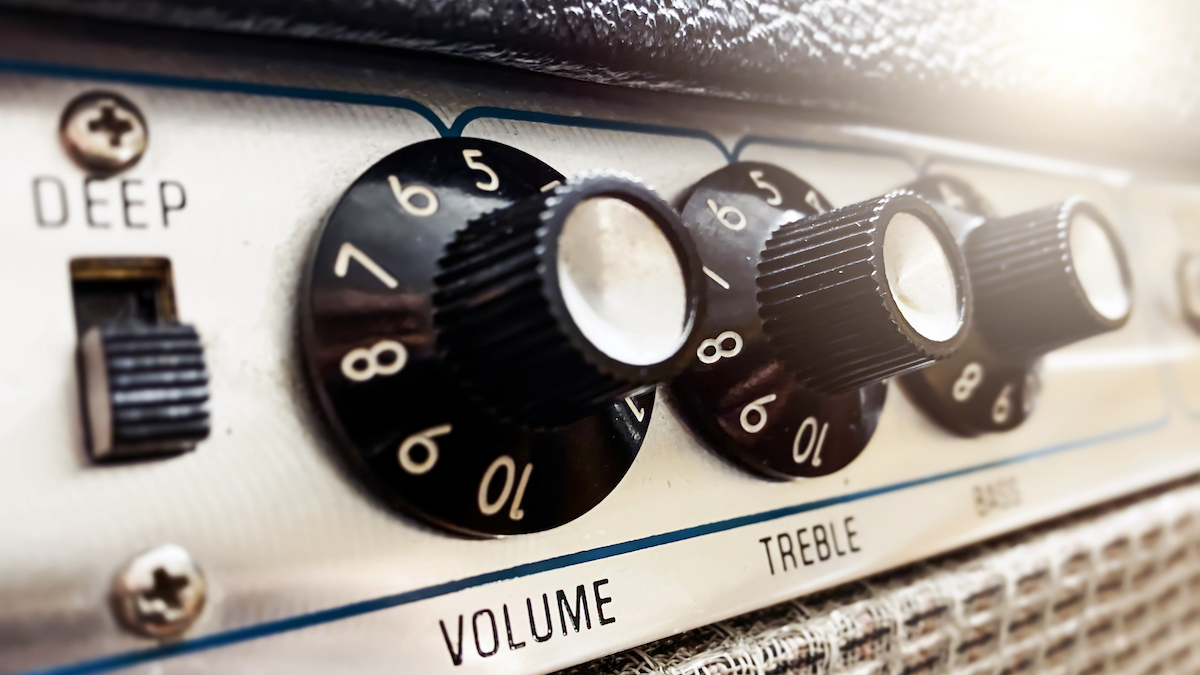
Close-up of guitar amp controls (Credits: Getty Images)
You’ll find this skill, known as transcribing, almost impossible at first, but persevere because it will become easier. Don’t beat yourself up if you make mistakes, either, and they are all part of the learning process.
There are plenty of apps out there that will help with ear training – they’re especially useful for identifying intervals – but looping a simple piece of music is an effective and inexpensive way to start.
12. Dial in the right tone
The controls on your guitar are usually relatively easy to get your head around. Typically, there’s a volume control and tone control for each pickup, plus a switch that enables you to blend one pickup with another for a hybrid tone.
Some amps, however, have myriad knobs with curious names such as Master and Presence. What’s going on?
Gain
This knob adjusts the amount of gain in the preamp section, which determines the level of distortion in your tone. It’s a critical tone-shaping tool that enables you to take advantage of a saturated, distorted tone at (relatively) lower volume levels. Usually, it is a feature of more modern amps.
Master
This adjusts the amount of gain in the power amp section. In rock’s heyday, in the late-’60s and 1970s, guitarists relied on driving the power amp section of their amps to achieve those creamy distorted tones we all love.
Unfortunately, pushing a power amp section into distortion is not at all ear-friendly, which is why many modern amps now feature a gain control to drive the preamp instead or as well. Power amp distortion responds well to dynamic playing. The more you dig in, the more your tone will become progressively distorted, back off, and your tone will begin to clean up.
Bass, middle, treble
These knobs EQ your guitar sound. They can be used to shape your tone – the infamous scooped midrange old-school metal sound, for example – or in a band performance context, you can alter the EQ of your sound to let other musicians shine through. For example, you don’t want to be taking up the same frequencies as the keyboard player, or you risk your band sounding muddy.
Presence
This adjusts the high-range frequencies, adding texture and making your sound livelier. It becomes more noticeable as you play louder.
Reverb (and other effects)
Your amp may feature reverb and other effects that can be dialed up and down or switched off completely.
Tonal Tips
To shape a brand-new tone from scratch, start with flat, neutral settings and make small adjustments, one at a time, from there. Flat settings are typically dialed in by turning all EQ knobs to 12 o’clock and the gain controls to 6 o’clock.
For high-gain rock and metal sounds, try turning the gain and presence up while keeping the mids dialed back for that aforementioned scooped sound.
To dial in a decent blues tone, try light gain, moderate bass, middling mids, and high trebles. For jazz, roll back the treble and warm up the mids without overcooking the bass. Dial the gain right back for a clean tone.
Always make small adjustments one at a time, or you’ll quickly get lost. Have fun; you’ll soon get the hang of it!
13. Learn all the notes on the fretboard
Wow, this sounds like an advanced topic, but it’s actually surprisingly easy. Start by learning all the notes and their corresponding fret positions on the low E string. There are only 12 notes (an octave) starting with E, which then repeats at the 12th fret.
Once you’ve learned the position of these notes, which may take a week or two, you’ll be delighted to learn that you’ve pretty much got the D string – the fourth string – down, too. The same series of notes, an octave higher, can be found two frets up the neck on the D string. For example, the first fret on the low E string is F, and the third fret on the D string is also F.
In turn, knowing the D string enables you to easily work out the notes on the B string – second string – because the same series starts a further three frets up the neck. For example, the sixth fret on the B string is also an F.
Of course, the high E string, the first and thinnest string, mirrors the low E string, so you’ve already learned this one without realizing it. This just leaves the fifth string and the third string. You will have to learn the note positions on the fifth string, but once you’ve mastered them, you’ll find the same series, just two frets up on the third string, just like before.
If you’re completely new to music and the guitar, you may find this all sounds a bit too confusing. Don’t worry; a quick look at a fretboard diagram will make it much easier to understand. Take your time, and there’s no rush.